26
How to Photograph the Moon
A Marques
How to
It’s a full moon today. So, here are a few tips to take great photos of the moon. Grab your camera and go out there.
The moon has always been a scene that attracts many amateurs and professional photographers. It’s without question the brightest spot in the night sky and maybe due to the lunar mystic or simply due to its beauty a magnet for cameras.
But photographing the moon is not as linear as it seems. The moon is very bright (more than you probably think) and getting the right exposure that avoids the flat look can be tricky.
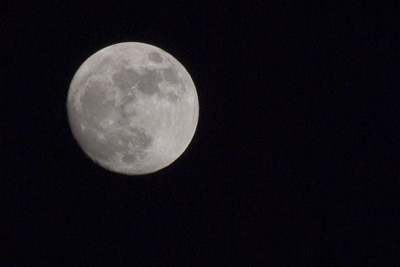
300mm; ISO 100; 1/250s; f/11
Gear
- Tripod – Although it’s a quick exposure, you’ll get the best results setting your camera on a tripod. Remember that you want detail and any kind of motion blurring can ruin the shot.
- Telephoto lens – Ah, how nice and big the moon looks… So why does it come out so small in a photo? It’s like that… For a good moon shot you’ll need a telephoto lens. You don’t need an expensive one (I used the cheap but so far good Sigma 75-300 f4-5.6) but for good detail a minimum of 300mm is recommended.
- Shutter Release cable – Not really needed but recommended. The pressure of your fingers on the shutter button will increase the motion blur. To avoid this you can get a shutter release cable or do like I did (I didn’t had my cable with me) and use the shutter delay feature of your camera (I’m sure it has one). A 2 sec delay is more than enough to get your hands of the camera.
Get busy with that photo
One of the most common mistakes photographers make when first attempting to get lunar shots is underestimating the brightness of the moon. The first shots will almost undoubtedly come out overexposed with an ugly bright circle where the moon should have been.
Many photographers claim that since the moon is directly illuminated by the sun, setting your camera for a “daylight photo” can be a solution. Some also recommend following the sunny 16 rule (f/16 at 1/ISO) or the loony 11 rule (f/11 at 1/ISO). If you take a look at the photo above and the settings I used, none of these actually applied but probably due to the fact that the Earth’s atmosphere absorbs a huge amount of the light and this value varies according to the angle of the moon above the horizon. Using a “fixed” value does not work and you should experiment to find the best results. I tried the following the loony 11 but gave an overexposed moon with some detail loss in the brightest areas.
Start with the following settings:
- Aperture at f/11
- ISO 100 (you don’t want any noise on your photo and it’s so bright there is really no need to go above 100)
- 1/125 – 1/250
Now set your autofocus to point, aim at the moon, focus and turn the autofocus off. Don’t touch that ring anymore.
For good measure bracket your EV 1 or 2 units (if your camera allows you can get a few sequential shots with different EV values).
And that is it. Moon photos galore.
And more…
Now that you have your moon, it’s time to work on it in silico.
The photo above was only cropped. No other processing. So, you can see that is possible to get average moon photos just out of your camera. If you want to make it even better, try playing a bit with the curves on Photoshop. You’ll probably manage to give more texture to your photo by increasing the contrast between midtones and highlights. Somehow I liked the result as it is (albeit flat) and decided not to touch it anymore.
If you want a more natural texture with more shadows, giving the lunar landscape a more tri-dimensional feeling, try shooting the different moon phases and not only full moon. The different angles at which the sun illuminates the lunar surface can create astonishing effects.
Now, this photo was taken back in the end of April, but for what I can see, today is full moon or very close to it. So, why not go outside and be creative? Let’s hope there are no clouds wherever you are.
Got any more tips for good lunar photography? Share them with us…
No related posts.


Comments:
January 26th, 2008 at 5:43 am
SIMPLE AND CLEAR INSTRUCTIONS, JUST WHAT I NEED AS I AM NEW TO PHOTOGRAPHY. WILL USE YOUR ADVICE FOR MY FIRST MOON SHOT AS SOON AS I HAVE ALL THE BITS AND PIECES FOR MY EOS 40D. AM REALLY LOOKING FORWARD TO IT. MANY THANKS, BILLY.
January 28th, 2008 at 9:24 pm
Hi Billy,
Thanks for your comment.
I wish you lots of success with your moon shots. Don’t forget to came back and share with us how it went.
April 22nd, 2008 at 11:56 am
I tried many settings on my EOS 400D and I couldn’t get a decent shot. I looked at your site, put in the settings and it worked brilliantly. Thanks. Very Clear and Simple.
Adam
April 29th, 2008 at 1:09 am
Hi Adam,
Thanks for the comment. It’s always good to know that what you put out there is useful to someone.
Want to tell us a bit more what went wrong with your first attempts? And what about posting those photos somewhere and telling us so we can take a look?
Thanks again for dropping by.
April 29th, 2008 at 2:23 pm
My first attempts failed because the moon turned out all smudgy.
I zoomed in on the photo in photoshop, so the quality is not that great.
It can be found here http://www.flickr.com/photos/adamp237/2451158281/
Prior to looking at this site, it was all a blur of one colour and no texture can be seen. This is a great improvement.
May 20th, 2008 at 4:12 am
Any tips on taking moon shots with other detail in the photo??
I’m a bit of car nut, but just love getting the moon in any shot really, finding I often have a generally good photo but just a plain boring white circle of the moon.
This pic here was before I got a proper camera (taken with cameraphone!) but I can’t get detail in the moon without making everything else blurry.
http://i19.photobucket.com/albums/b153/gts167/GTS-TP4/DSC00063.jpg
Now if this was taken with my 400D, it would be zoomed up more so moon is bit bigger, but I can’t anything more than a plain circle for the moon….. or am I just expecting too much?
May 20th, 2008 at 5:18 am
Take 2 shots. Make one the correct aperature and shutter speed (and everything else will be blurry) and take another with the car in focus. See if you can photoshop them together.
Hope that makes sense.
Goodluck.
September 8th, 2008 at 1:19 pm
http://img216.imageshack.us/my.php?image=moon1gu3.jpg
http://img216.imageshack.us/my.php?image=moon2ki0.jpg
excellent advice!! thank you very much..went to F13 and a higher shutter speed for these.
September 23rd, 2008 at 10:59 pm
great tutorial. many thanks
September 24th, 2008 at 5:25 pm
Thanks for the comment. Hope to see you around more often.
October 16th, 2008 at 2:53 pm
Just tried taking my first moon shots and found this when looking for more info when I got back.
Here’s the first stab: f/8, 200mm, 1/20 @ ISO100.
http://pix.purplecow.org/?p=110
October 18th, 2008 at 2:44 pm
It’s a great moon shot. By looking at it I can tell you’re in a different part of the world
When you do the cropping, try placing the moon not so centered. Follow the rule of thirds and you’ll get a higher impact image.
Thanks for the comment.
January 10th, 2009 at 5:02 am
THANK YOU!!! I cannot tell you how many sites I have gone to to try and figure this out. I have taken hundreds of shots with no results. I used your instructions and took 4. I got a shot I really like. thank you!
January 15th, 2009 at 7:49 am
Excellent,
Thanks for your advise. I took the picture following your tips of an amazing orange moon and is fantastic. Thanks for sharing.
January 16th, 2009 at 2:37 pm
Hi Rebecca,
I’m glad that this article helped you with your moon shot. I’ve taken a look at your Flickr stream and that photo came out really good. Congratulations. Did you tweak the setting I suggested or it was just as I listed?
Thanks again for dropping by.
January 16th, 2009 at 2:38 pm
Hi Numi,
Want to share a link to it?
January 16th, 2009 at 5:54 pm
Oh I love my photoshop. I tweaked it. Thank you so much. I shared this link with my beginning photography group. You rock.
May 22nd, 2009 at 7:29 am
hi.. this is so good. its very useful and helpful post. i really like it. i love photography.. thanks .
July 15th, 2009 at 11:41 pm
i’ve found that you don’t really need a shutter release cable as long as you have a timer set for like 10 seconds. The other important thing is to have a heavy tripod, I’ve found that for these really long exposures a wimpy little tripod won’t really keep everything as still as it should for really crisp shots.
August 7th, 2009 at 5:54 am
I echo the comments of the others. Once I read your post and took a few shots, I realized I had been seriously over exposing the shot – it is a FULL moon, it is bright no need for long exposures – duh! Why didn’t I think of that!? Thanks again, very helpful.
August 17th, 2009 at 9:25 pm
This is a really good article on moon photography as I always tended to overexpose. If you would like to find out when the moon will appear in a certain location, check out http://www.findthemoon.com.
October 4th, 2009 at 11:46 pm
Thought I would share one from tonight
Taken with a Sony a200 using a Tamron 70-300mm lens
Exposure: 0.008 sec (1/125)
Aperture: f/10.0
Focal Length: 300 mm
Exposure: 0.00
ISO Speed: 100
Exposure Bias: 0 EV
http://www.flickr.com/photos/24378537@N07/3980941305/sizes/o/
October 5th, 2009 at 7:03 am
THANKS.. 100 ISO F11 1/200 Canon 100-400 IS “L” lens @ 400 mm awesome.. Md -
December 2nd, 2009 at 8:32 pm
Thanks for your info and advise….Tripod, camera and I got a clear shot of the moon 5 minutes ago!
Cheer’s
Nick
January 1st, 2010 at 4:50 am
I wanted to take photos of the New Year’s Eve Blue Moon. I’m a novice D-SLR photographer with a new Canon Rebel XS. The settings worked great. Thx
January 28th, 2010 at 11:14 pm
Thanks a lot
I realy wanna be a photographer
I love this art so much
January 30th, 2010 at 3:26 am
I always forget that the moon is light! And was very frustrated this evening when I couldn’t get a good shot of the largest full moon of the year. How happy i was to find this article. Here is the result http://gallerly.me.com/karenod1/100296
January 30th, 2010 at 5:05 am
Just tried your tips and got the best photos ever. I used a Canon Rebel XT with a Sigma 170-500mm zoom, ISO 100, f/11, 1/125 to 1/250. Tonight 1/125 seems to work best here in S.E. Michigan. It is clear and cold. Thanks for the tips.
Tom
January 30th, 2010 at 1:30 pm
Hi! Thanks so much for the tips. Using my Canon EOS 400D with the sigma 7-300mm 1:4-5.6, I followed your suggestion 1/125 at F11 and ISO 100 and got the lunar details at F11. But a softer more natural look at F10. You’re very helpful and thank you so much for sharing. It was really frustrating to get only the bright circle when I want to capture the moon as I see it by my eyes. Found this link.
Trackbacks
Add a Comment